Step by Step How to Deploy Nano Server in Windows Server 2016
What is Microsoft Nano Server?
Microsoft Nano Server is a headless operating system that is designed to run services and other cloud infrastructure without any GUI or other management consoles built in. It is especially an exciting platform for certain cloud based applications as well as containers and also in thinking about running Hyper-V on top of Nano Server. The footprint of the Nano Server platform is especially tiny even when compared to the Server Core GUI less operating system that has been around since Windows Server 2008. Nano server unlike Server Core has no command prompt or PowerShell console that can be accessed. However, like Server Core it can be managed using a remote PowerShell connection.
The installation and provisioning of Nano Server is not for the faint of heart as it requires quite a bit of PowerShell to configure and provision the Nano Server image. However, Microsoft released the Nano Server Image Builder utility that provides a graphical interface to allow you to deploy Nano Server images and bootable USB drives.
Let get started…
1 – I have also copied the NanoServer folder from the Windows Server 2016 media to the D:\Nano\Windows Server 2016 folder. Simply run the Powershell ISE script prompt.
C:\Nano\NanoServerImageGenerator\NanoServerImageGenerator.psm1


2 – The second thing that you will need to open an PowerShell ISE session and adjust the server’s execution policy if necessary. For the sake of simplicity, I am using an execution policy of Unrestricted.
1. cd \
2. Set-ExecutionPolicy RemoteSigned
3. Import-Module c:\nano\NanoServerImageGenerator.psm1 -verbose
4. C:\Nano\Convert-WindowsImage.ps1
5. New-NanoServerImage -Edition Standard -DeploymentType Guest -MediaPath D:\ -BasePath .\Base -TargetPath c:\NanoServer\NanoServer-01.vhd -ComputerName NANO-01 -compute –GuestDrivers
In the previous code, we’re installing the Hyper-V server bits (-Compute workload) and the Hyper-V guest drivers (-GuestDrivers workload). The Compute workload enables our Nano Server to act as a Hyper-V host. We’ll also be prompted for a local administrator password.
3 – Let’s start with setting up execution policy.

4 – Next what we need to do is to import in the module (which is stored in NanoServerImageGenerator). This will give us all the different commands we need for creating Nano server image.

5 – No we have the access to those commands which are necessary in order to manage and build Nano Server image. Let’s create our image by typing.


6 – When we hit enter, it should create vhdx file out of the .wim file that exists in NanoServer folder. As we creating this vhdx file the original .wim file itself is not modified in performing this process.

7 – When it’s done it will provide us with the log file that include info about what we just created. If you go to C:\NanoServer you will be able to see.

– Starting Nano for the first time
In my environment, I’ll use one of my Windows Server 2016 as a Hyper-V host that, in turn, owns our new Nano VM.
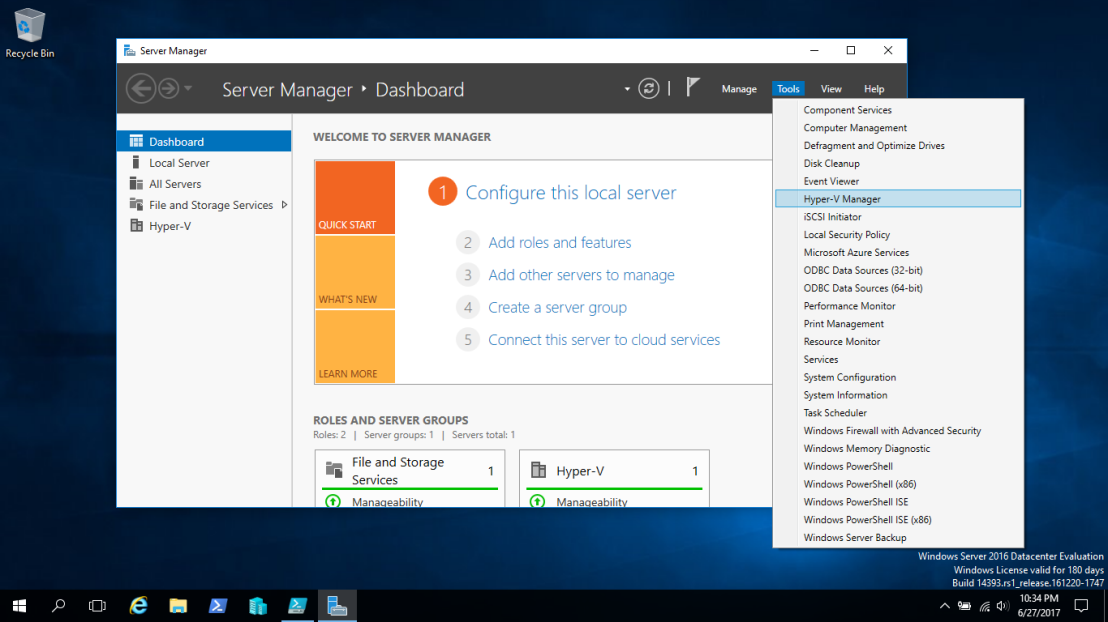
1 – open Server Manager –> Tools –> open Hyper-V Manager.
2 – Create Virtual machine on Hyper-V Manager console, right click on Sifad-Server and then click on New. Click on Virtual Machine to create a new virtual machine.

3 – create Virtual machine in Hyper-V, on “Specify Name and Location” give the name of the virtual machine. NANO-01 will be the name of this virtual machine. Check “store the virtual machine in a different location” for saving the machine in a different location other than the default location. In this practical, we have changed the machine location to “C:\Virtual Machines\Nano-01″.

4 – create Virtual machine in Hyper-V, on “Specify Generation” console, we have selected the Generation 2. This generation provides the support for features such as SCSI boot and PXE boot using a standard network adapter. The basic required operating system for this generation must be Windows server 2016 and any 64-bit version of windows 10. Whereas, Generation 1 provides the same virtual hardware to the virtual machines as in previous versions of Hyper-V. Click on next to continue.

5 – “Assign Memory” console, Specify the amount of RAM in MB to allocate to this virtual machine. By default, it takes 512 MB. If we check “Use Dynamic Memory for his virtual machine” then virtual machine uses the RAM as per its requirement from the physical server. But, to a maximum limit of 512 MB. If we remain, unchecked this option, whole 512 MB of RAM will be allocated to the virtual machine. Click on Next.

6 – “Configure Networking” console, Select a virtual switch from the available virtual switches in the drop-down menu of connection. In this practical, Vswitch is the name of the virtual switch that we have selected. Click on Next to continue.

7 – On the “Connect Virtual Hard Disk” screen, select the radio button of Use an existing virtual hard disk, then specify the location of the virtual hard disk in the Location box. You can click on Browse button to select the Nano-1.vhd directly.


8 – On “Completing the New Virtual Machine Wizard” console, we can verify all the steps which we selected on previous consoles. Click on finish, to create the virtual machine and to close this wizard.

9 – On “Hyper-V Manager” console, under Virtual Machines we can see that our virtual machine NANO-01 is listed. Right click on NANO-01 then click on “Connect“.

10 – After connecting with the virtual machine, power on the machine and it will automatically Start. Using the same steps you can create multiple Virtual Machines on Hyper-V server 2016.


11 – The Nano Server login screen.

12 – Nano Server deployed, this screen is after logging in to to the machine.

4 – Managing Nano Server day to day
In one word, we manage Nano Server by using remoting. If the GUI is your “thing,” then you can use Server Manager to load your Nano Server and manage its services graphically.
Windows Server 2016 supports an awesome technology called PowerShell Direct that enables you to send PowerShell from a Hyper-V host directly to its compatible guests, even if the guests don’t have an active networking stack! Isn’t that awesome?
1 – First, I need to modify my server’s TrustedHosts cache because Nano runs in a workgroup at this point in my environment:
Set–Item –Path WSMan:\localhost\client\TrustedHosts –Value ‘Nano1’ –Force
Then, I’ll enter an interactive remote session with Nano-01 and relax the script execution policy temporarily:
Enter–PSSession –ComputerName ‘Nano-01’ –Credential ‘Administrator’
Watch the YouTube Video to see the completely configuration
Comments
Post a Comment